Preface
This tutorial is based on the basic requirements of cross-border users and cross-border e-commerce self-learners for cross-border network access. Any actions and legal issues arising from its use are not the responsibility of the tutorial creators (illegal use is strictly prohibited!).
1. For fingerprint browsers, global proxy must be enabled before creating SOCKS5 in the panel. If you don’t know how, please contact the fingerprint browser official support.
2. Please use a clean system and strictly follow the tutorial installation steps. If any other scripts were previously installed, reinstall the system directly from the control panel. If problems occur after installation, reinstall again and start from scratch. The tutorial itself is correct; any issues are due to incorrect operation.
3. If something is not mentioned in the tutorial, do not ask about it. Search on Baidu or Google yourself. Customer support cannot answer too many unrelated questions.
4. To avoid apt package issues, Ubuntu 20 is recommended for installation.
5. This tutorial helps avoid DNS leakage (in other countries).
6. Proxy software must be set to global mode. In Shadowrocket, set “Global Route” to “Proxy”.
7. Device environment must be configured for time, language, and region. Do not insert domestic SIM cards.
The relay server used in this tutorial: UCloud Thailand Residential IP lightweight instance.
1. Purchase a Lightweight Cloud Server or VPS
Order link: UCloud Cloud Server – Hong Kong VPS – Limited-Time Discount from 10% Off – Cross-Border Cloud Services
VPS latency testing websites:
Recommended SSH tools:
- FinalShell (professional)
- ATerminal (beginner-friendly)
- Xshell (paid software)
2. Start Setup (Example: UCloud Lightweight Instance)
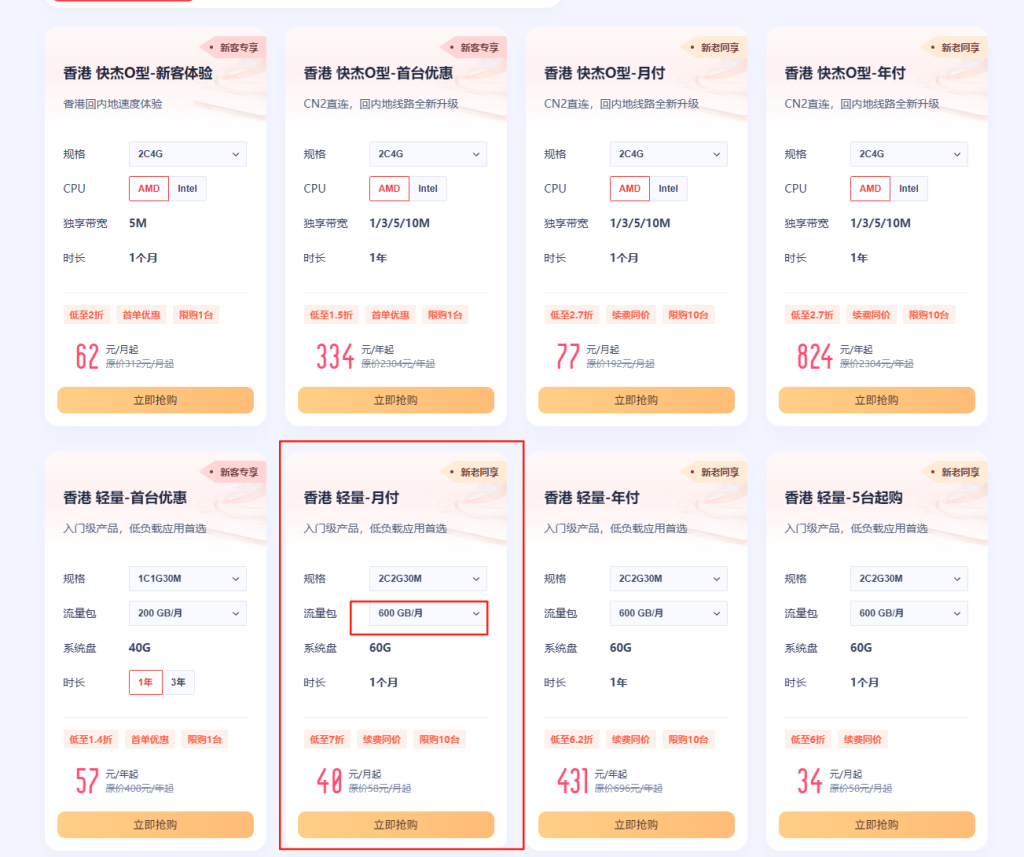
As shown, select the most cost-effective Hong Kong lightweight monthly plan from the promotion page.
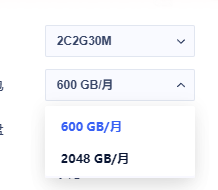
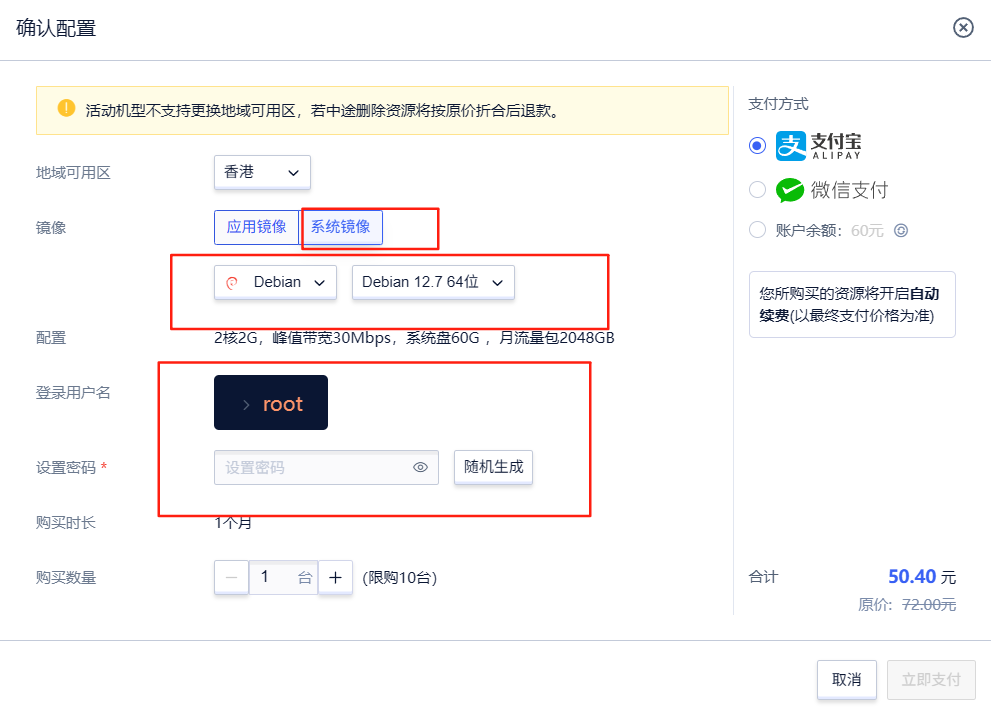
Adjust the traffic package to 2048GB/month, priced at 50.4 RMB. Click “Buy Now”. Make sure the region is Hong Kong, choose Debian 12.7, set the password, and place the order.
Click pay. After completion, go to the console → lightweight cloud host (ULHost). Find your instance and open firewall settings.
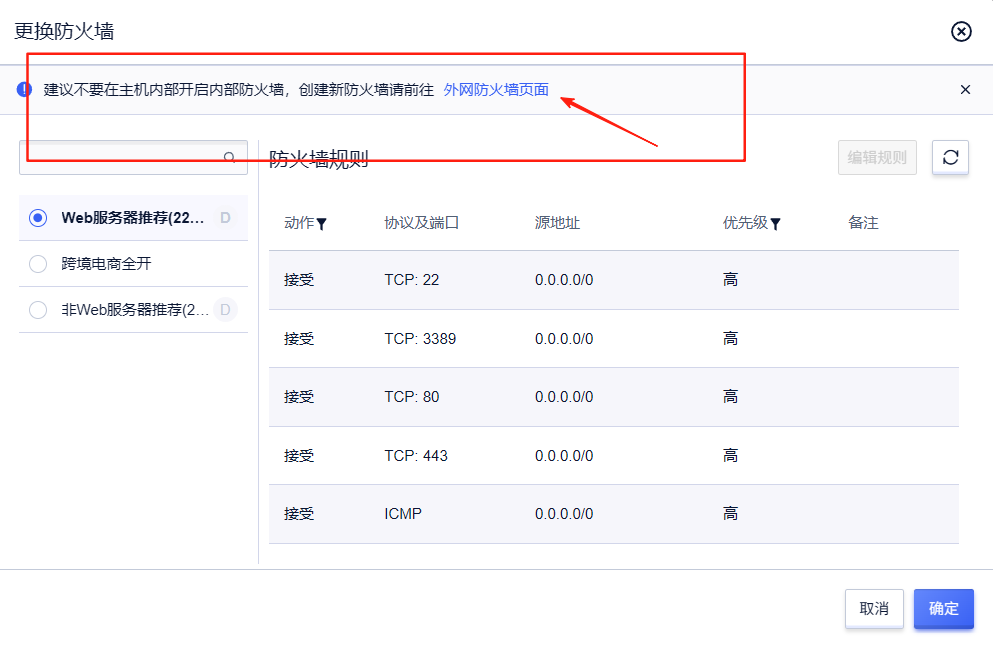
Create a new firewall rule by clicking the blue link.
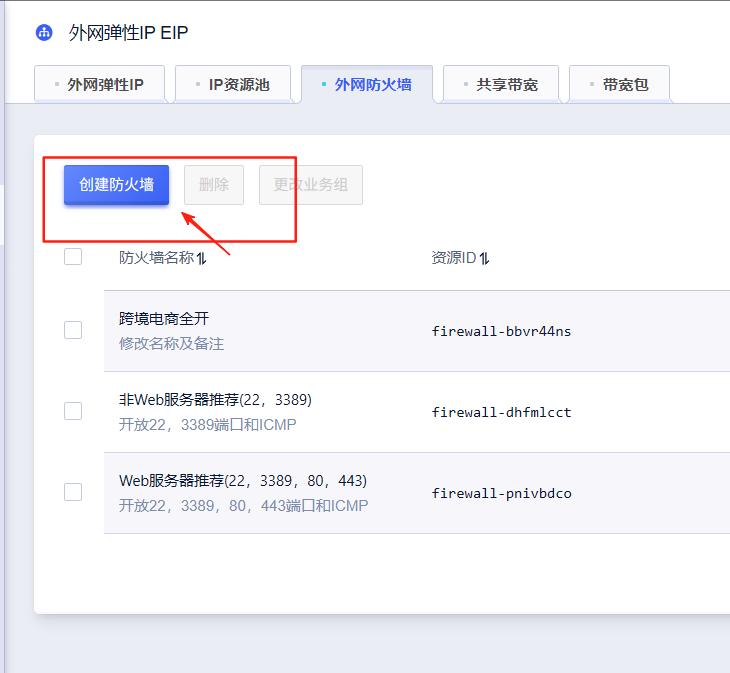
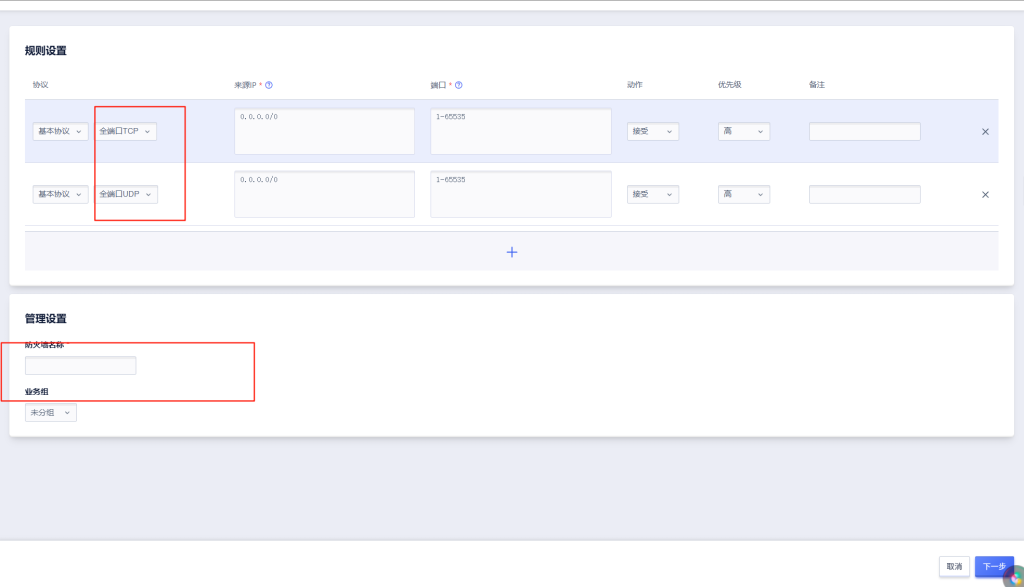
Create firewall rules: allow full TCP and full UDP ports. Name it freely. Confirm and proceed. (Note: firewall rules are region-specific; you must verify settings per region or you may lose access.)
3. Example: UCloud Kuaijie Instance
Some tutorial steps are skipped. For pricing details, contact UCloud sales.
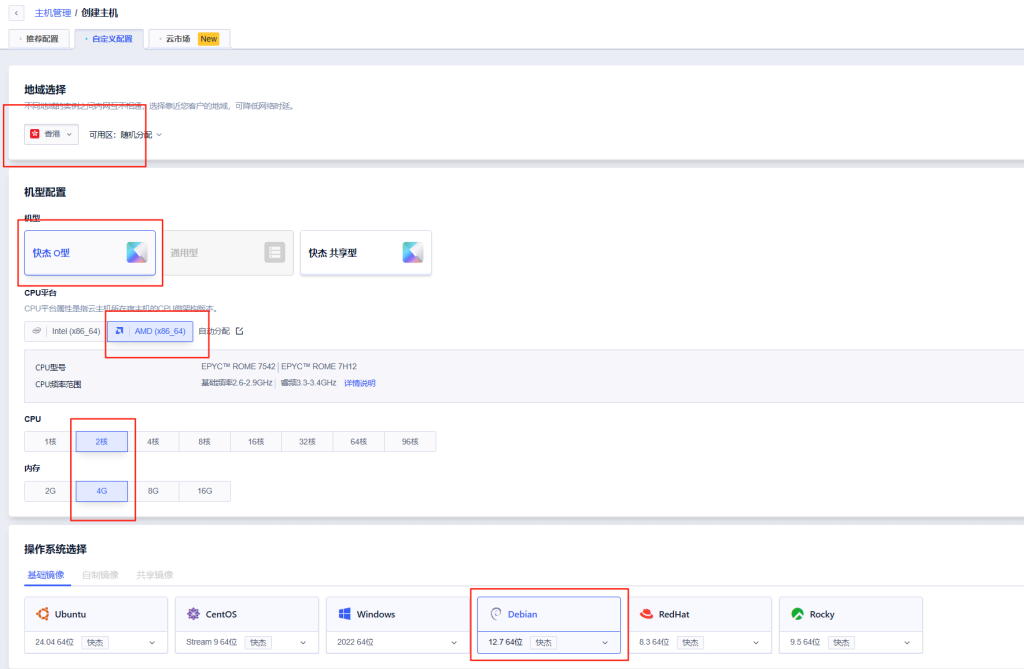
Select: Hong Kong region → Kuaijie instance → AMD CPU → 1C2G or 2C4G → Debian 12.7 system.
Keep disk at 20GB only. Remove extra disks if automatically added.
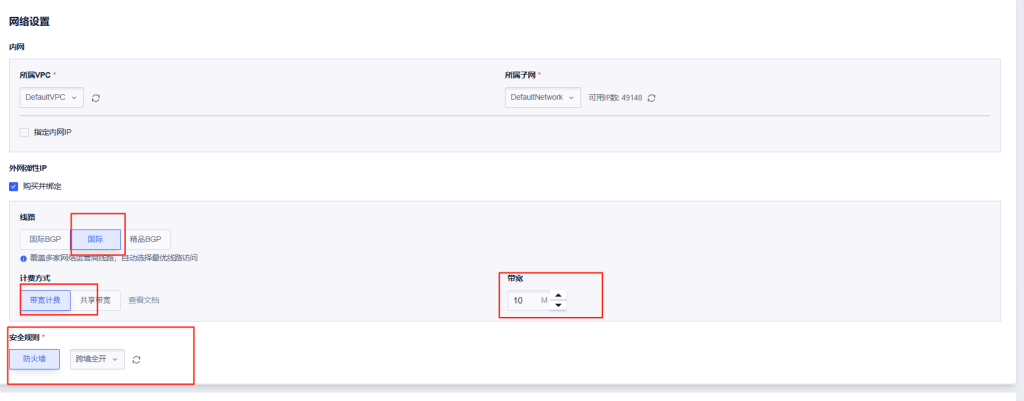
Select public elastic IP, international line, bandwidth billing. Apply firewall rule created earlier.
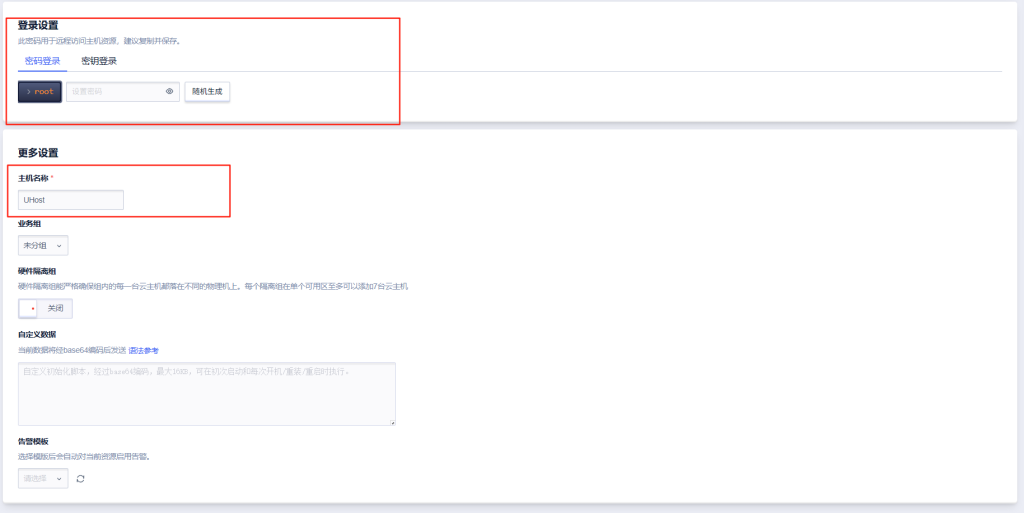
Set login credentials: username root, password set by user (save it carefully).
Hostname can be anything (e.g., uhosthk). Create instance and proceed to login.
4. Login
ATerminal is recommended. Download and register to use SSH management (free version is sufficient).
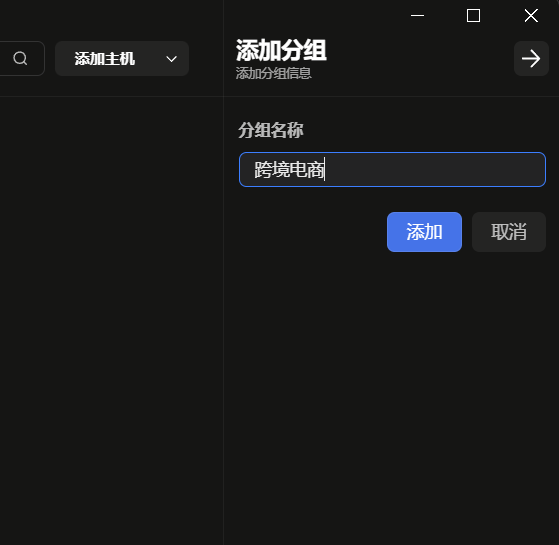
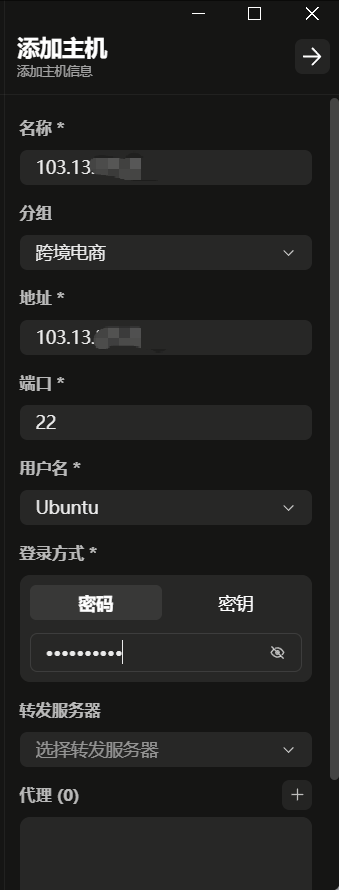
Create a group first, then add host with SSH information and save.
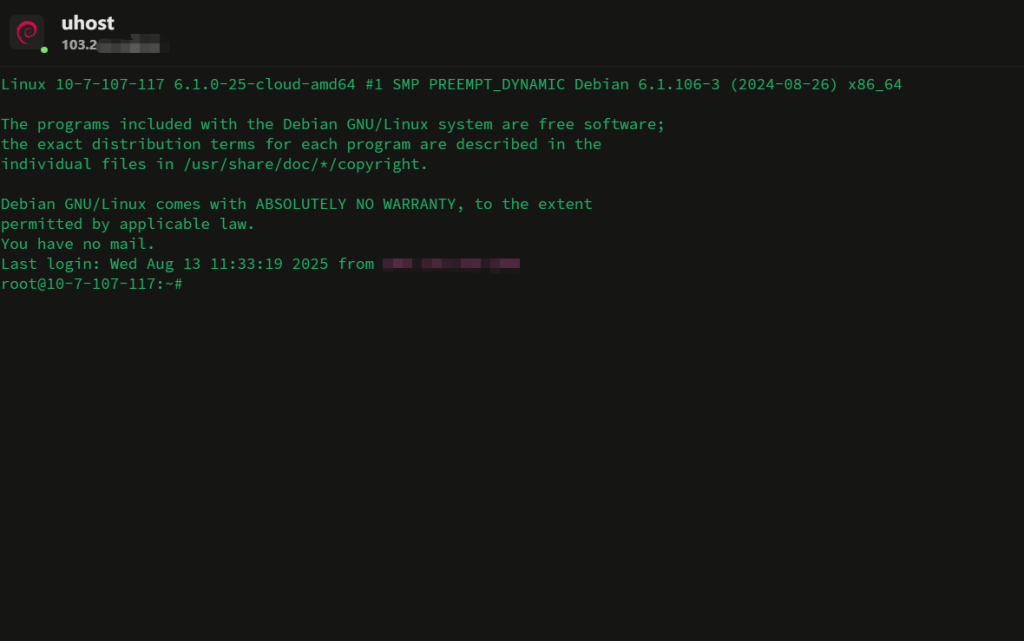
Open the created host.
Run the following command:
bash <(curl -Ls https://raw.githubusercontent.com/alireza0/x-ui/master/install.sh)
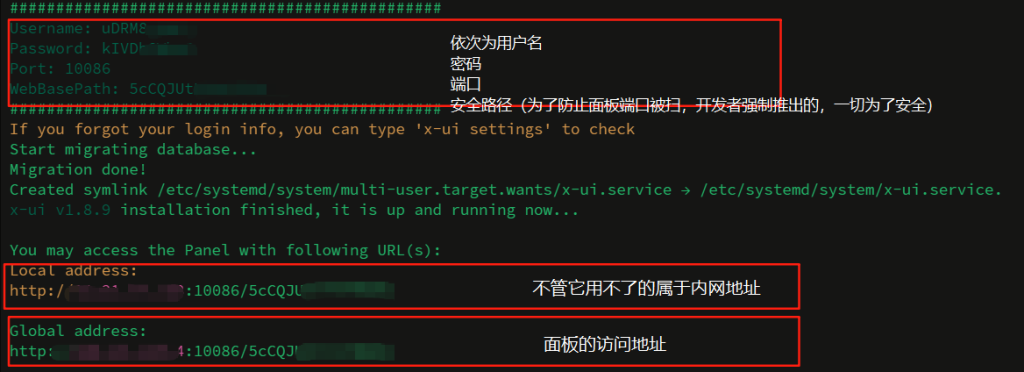
When prompted, choose whether to customize the port. Input “y” and set port 10086.

Installation completes successfully.
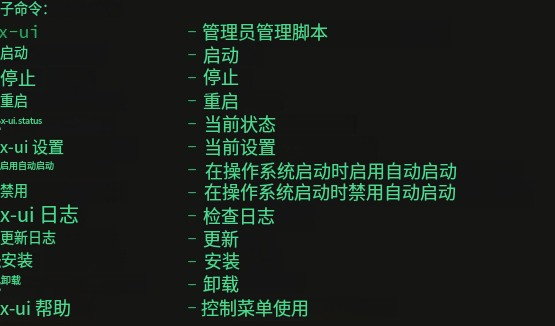
Run x-ui, enable BBR (option 20 → 1).
BBR (Bottleneck Bandwidth and RTT) improves transmission efficiency and reduces latency.
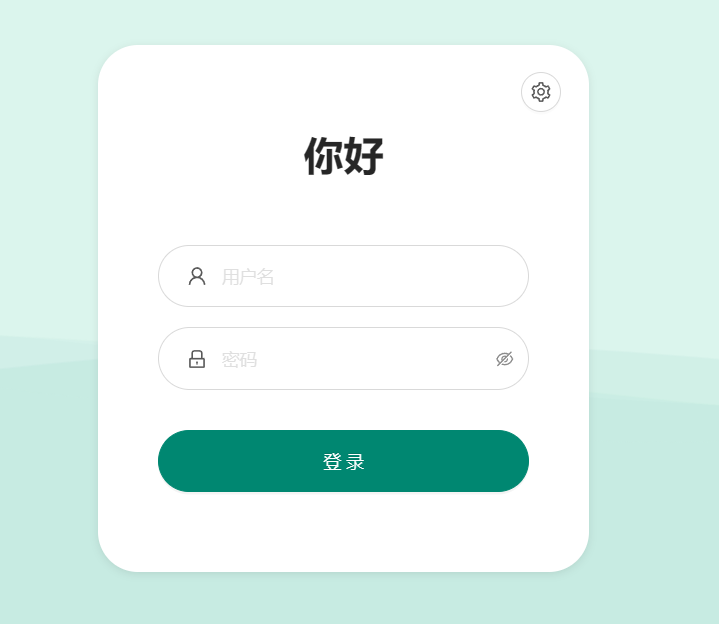
Access panel: https://yourIP:port/secure-path
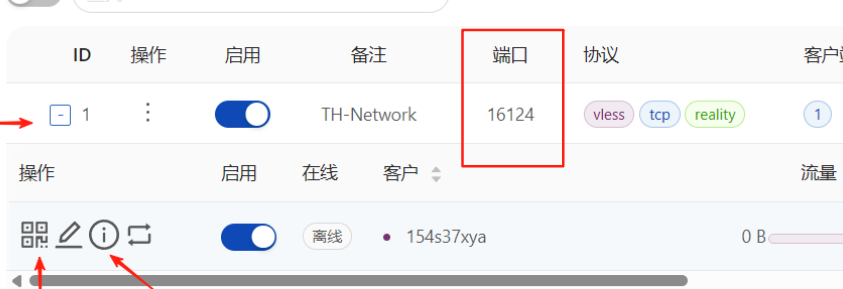
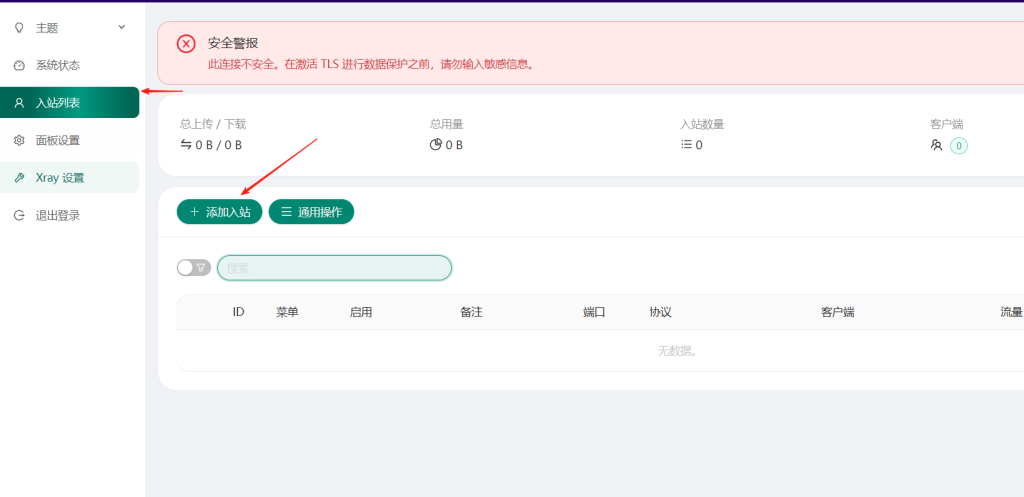
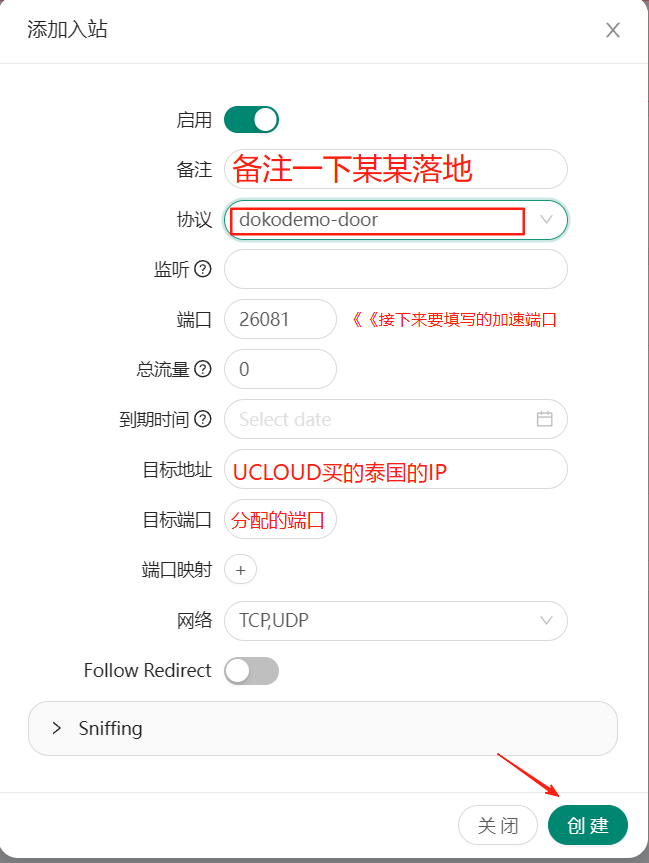
Add inbound rule → protocol dokodemo-door → set target IP and port → create.
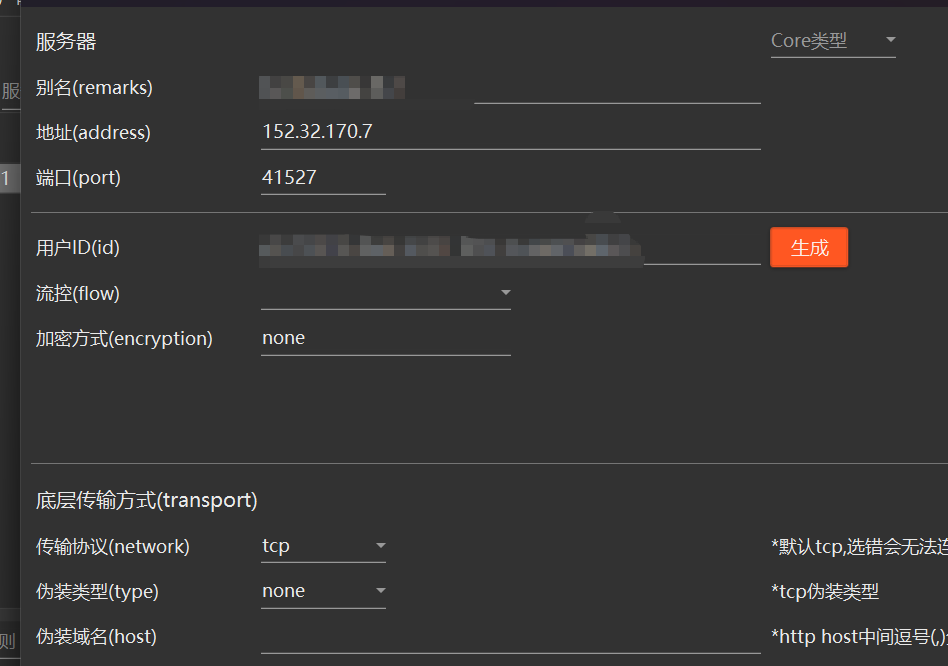
Export VMESS link and use v2rayN to modify IP and port.
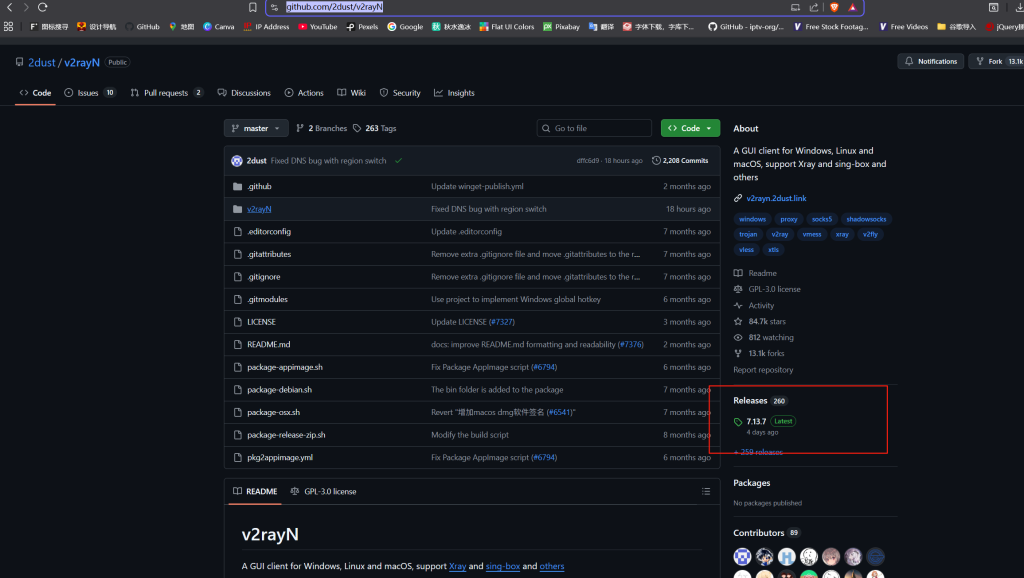
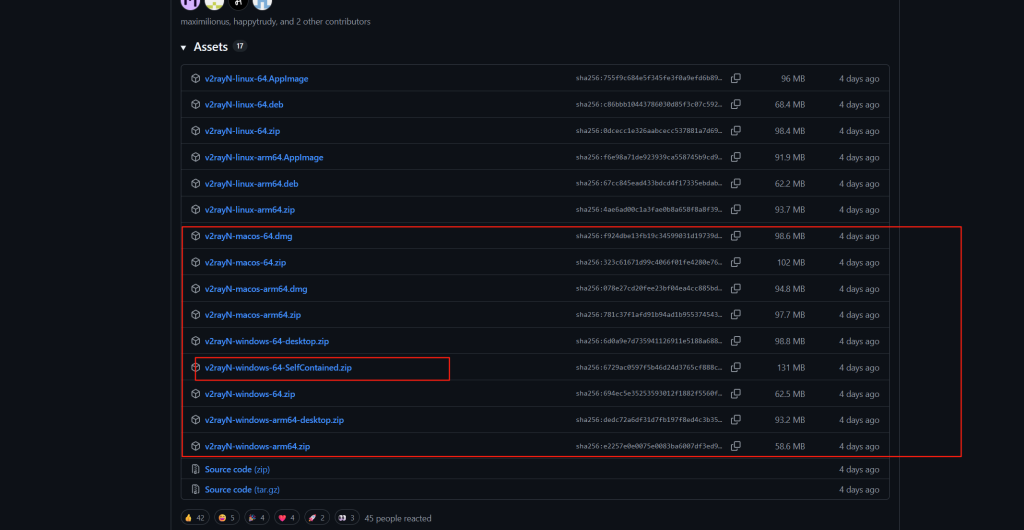
Download v2rayN from GitHub releases → extract → run v2rayN.exe

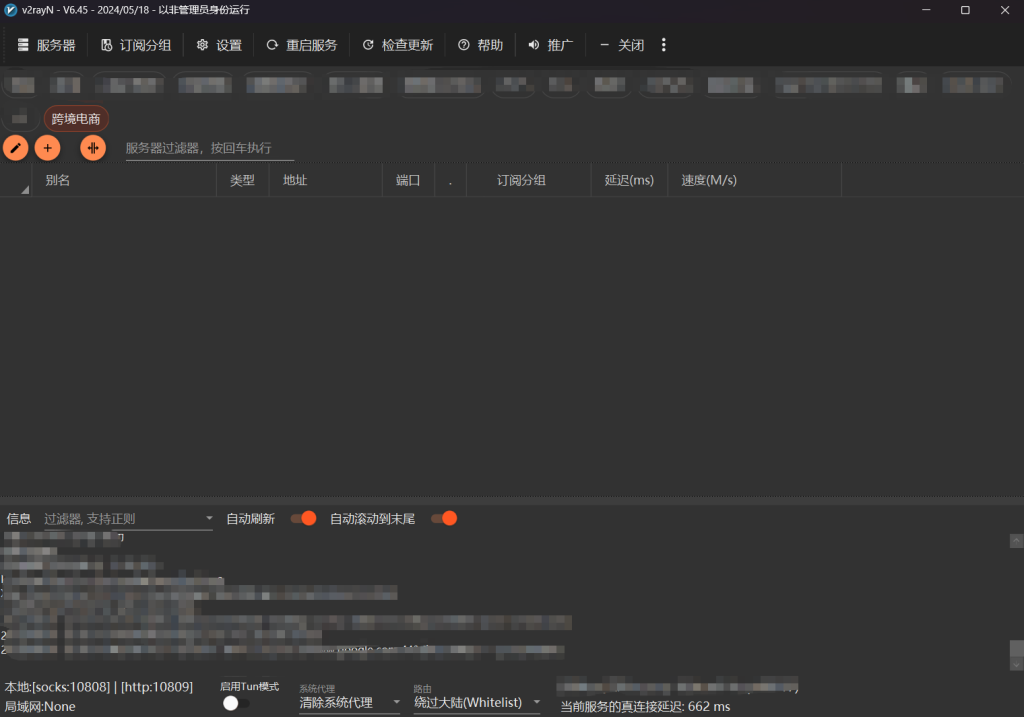
Import node from clipboard → edit IP/port → save.

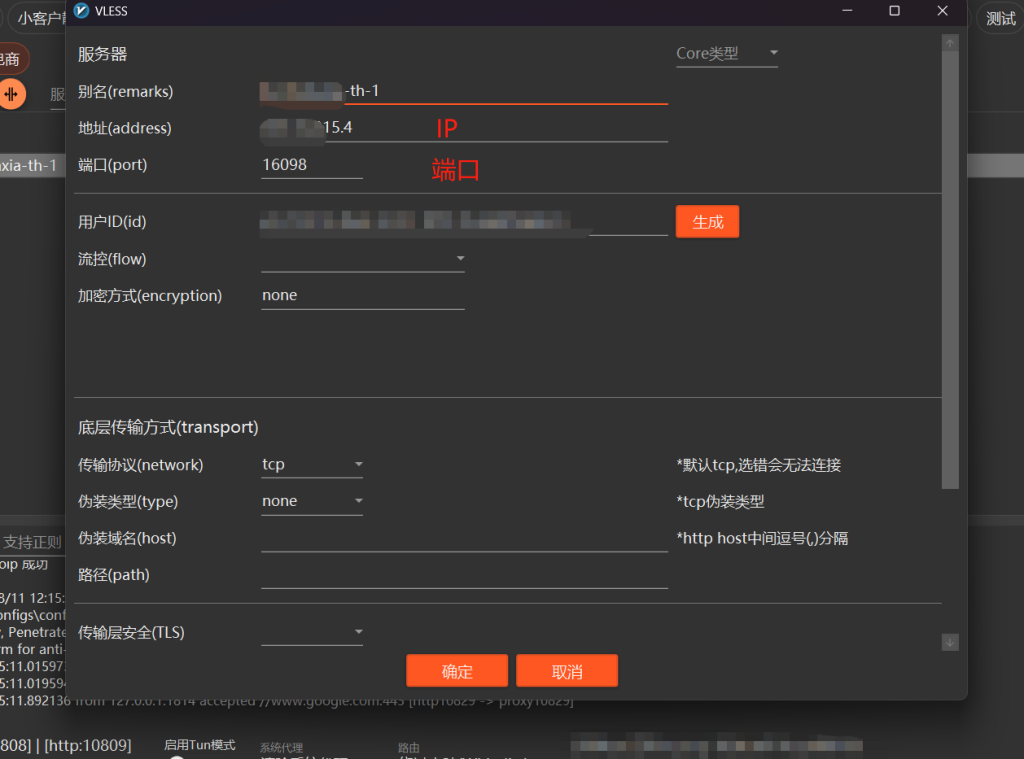
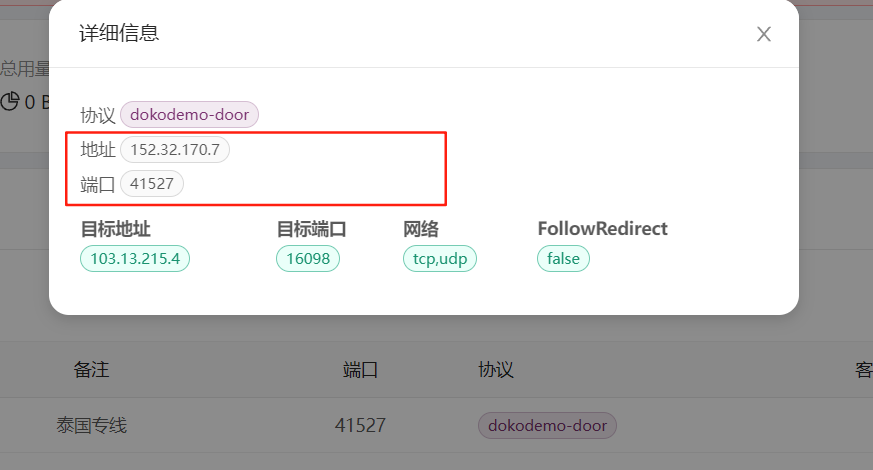
After setup, you will see relay address and port.
Set system proxy to automatic. Route can be full proxy or bypass China depending on use case.

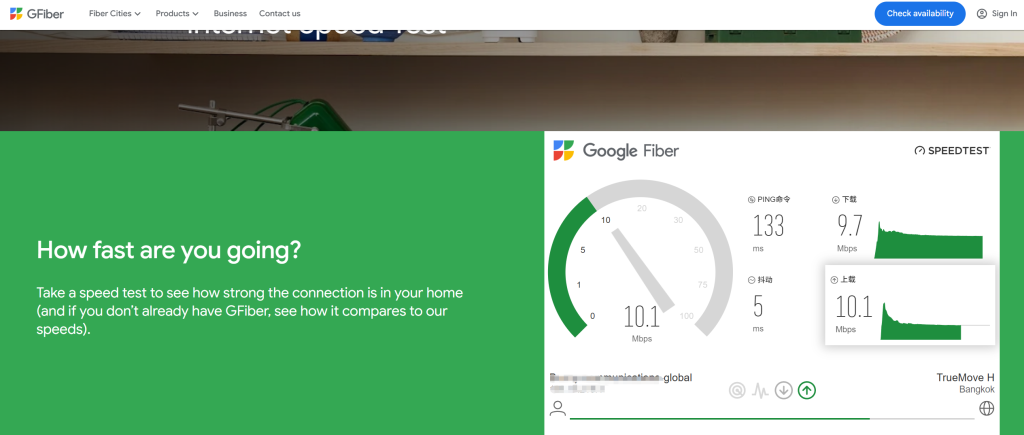
Test result shows stable performance and full bandwidth utilization, suitable for cross-border e-commerce usage.