A step-by-step tutorial showing how to use a BandwagonHost E-Commerce VPS to deploy a WordPress blog, OpenList cloud drive (connected to Quark cloud storage), and RustDesk remote desktop service. No coding experience required. Complete deployment process, detailed screenshots, and performance optimization—all in one guide!
1. Introduction: Why Build Your Own “Digital Sovereignty Space”
Many users pursuing digital independence have experienced the following frustrations:
- Content restrictions and censorship on public blogging platforms;
- Speed limits and file scanning on mainstream cloud storage services;
- Constant ads or forced phone verification in remote desktop tools.
Most people simply “put up with it,” but today we break that compromise.
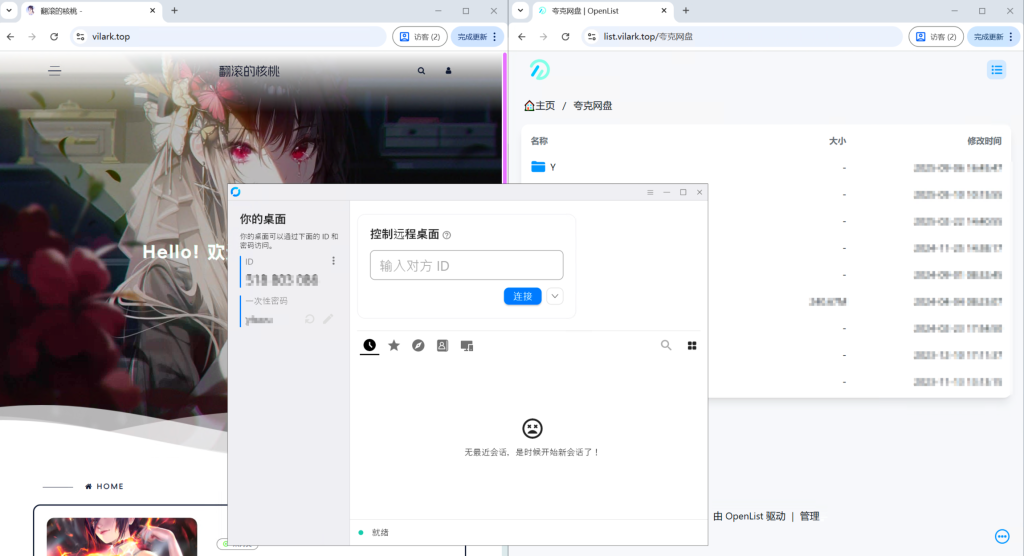
In this guide, we will use a BandwagonHost E-Commerce VPS (CN2 GIA optimized route) to build your own three-in-one digital system:
- WordPress personal blog — your independent content platform;
- OpenList + Quark Cloud — a 6TB personal cloud storage system;
- RustDesk Remote Desktop — a fast, secure private remote access solution.
No programming knowledge or server experience required. Just follow the steps and complete everything from a single computer.
2. Preparation
Please prepare the following tools and accounts:
- A working email address (QQ, 163, Gmail, etc.);
- Alipay balance (for VPS and domain purchase);
- Quark Cloud 88VIP account (approx. $10/year via resale platforms, 6TB storage);
- Chrome or modern browser;
- Notepad or Word document for saving IP, password, ports.
3. Buy VPS & Install System
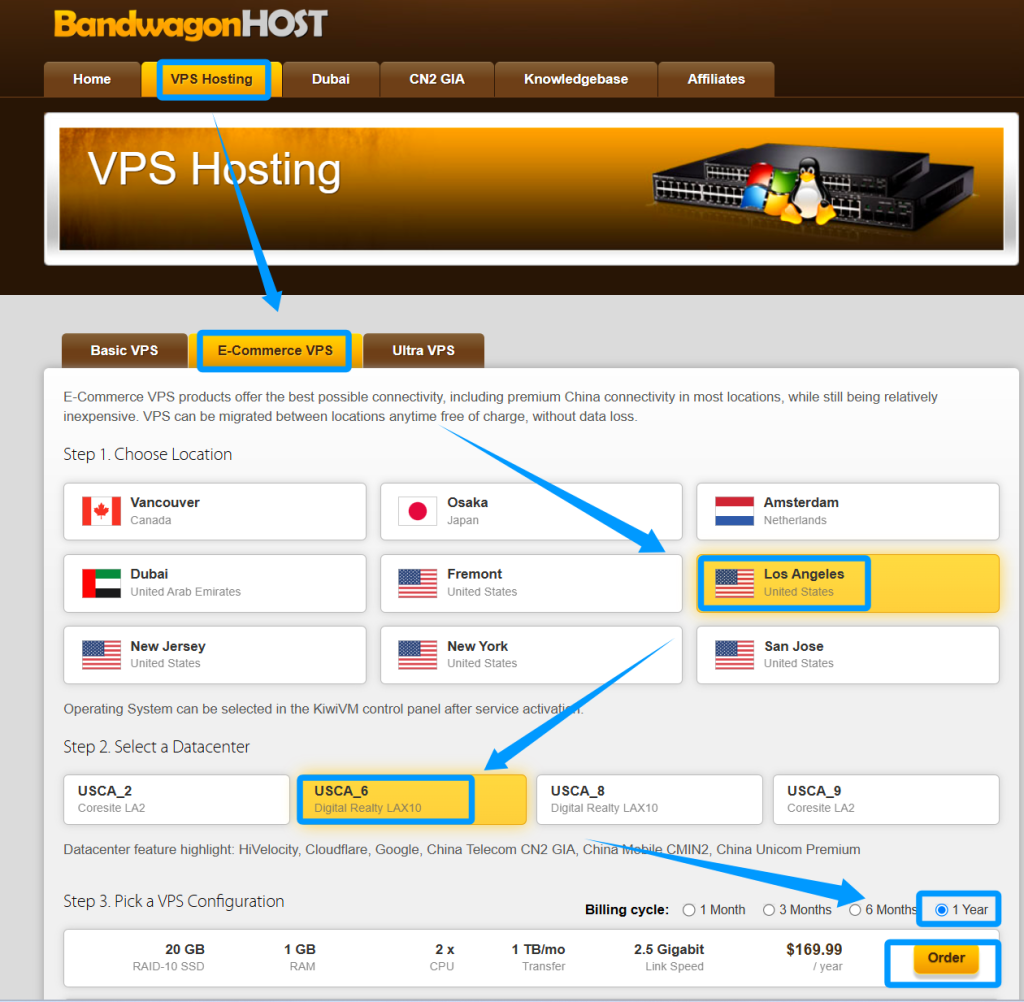
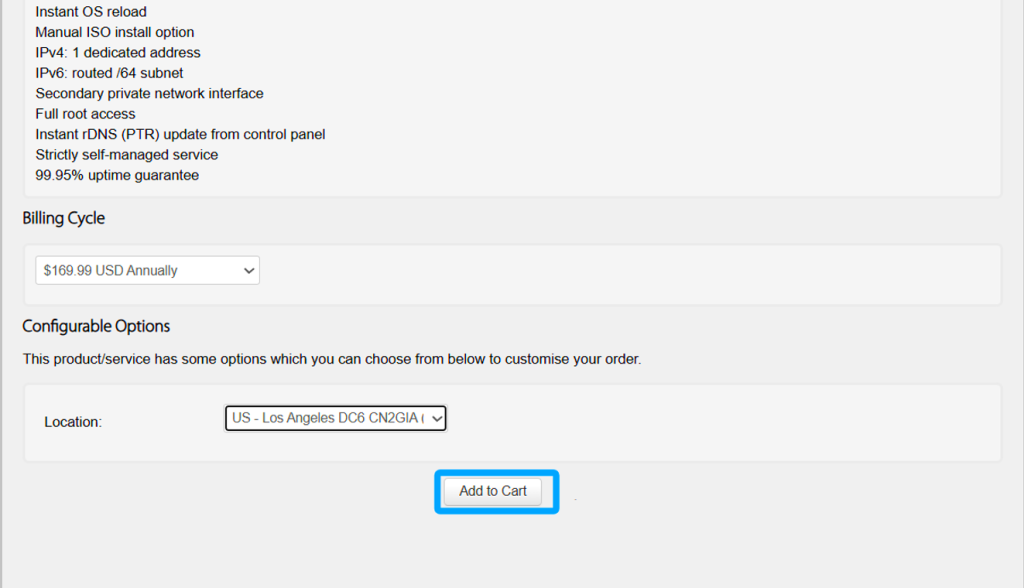
We use: BandwagonHost E-Commerce VPS (2C/2G/40GB SSD/2TB traffic), Los Angeles DC6 CN2 GIA.
- Visit: BandwagonHost Official Site
- Select VPS plan and add to cart;
- Pay via Alipay after registration;
- Login to user panel → copy VPS IP;
- Open KiwiVM → Stop VPS → Install OS;
- Select Debian 12 and confirm installation;
- Save root password and SSH port.
4. Buy Domain & Point to Server
Recommended registrar: NameSilo
- Add A record pointing domain to VPS IP;
- Add subdomains if needed (e.g., list.example.com).
5. Install BT Panel & Environment
- Connect VPS using Xshell;
- Install BT Panel (Debian 12 supported);
- Login to panel;
- Install LNMP (Nginx + MySQL + PHP);
6. Deploy WordPress + Boxmoe Theme
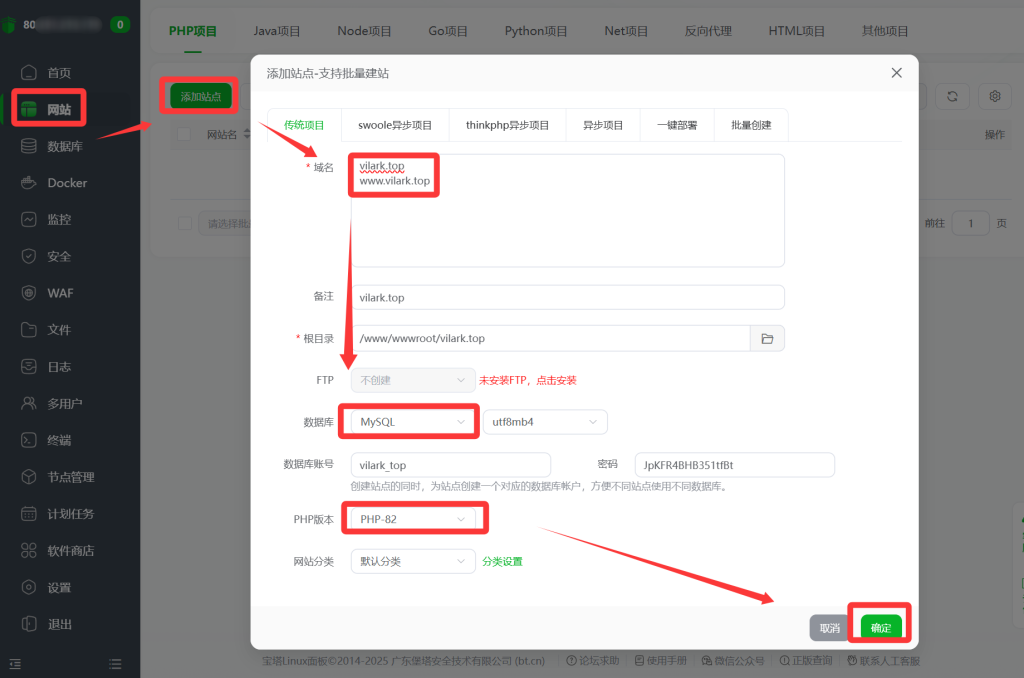
- Create website + database in BT panel;
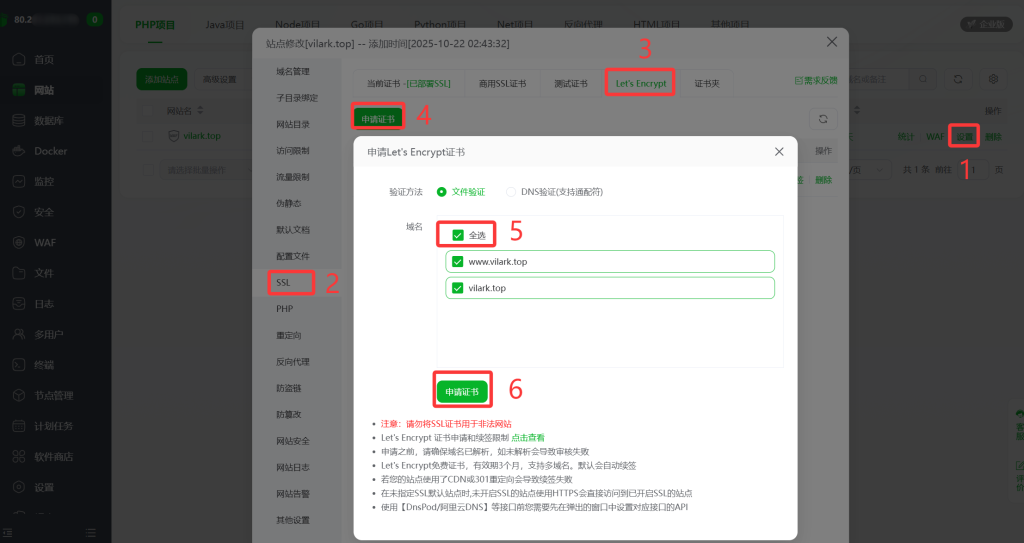
- Enable SSL (Let’s Encrypt);
- Set rewrite rules for WordPress;
- Download WordPress:
https://wordpress.org/latest.tar.gz
- Upload to root directory and extract;
- Open domain to install WordPress;
- Login admin panel and install theme:
7. Install OpenList & Connect Quark Cloud
- Create subdomain list.example.com;
- Add reverse proxy:
http://127.0.0.1:5244
- Install OpenList via SSH:
apt-get install wget curl vim sudo unzip -y
curl -fsSL https://res.oplist.org/script/v4.sh > install-openlist-v4.sh && sudo bash install-openlist-v4.sh
- Login with generated credentials;
- Add Quark Cloud storage;
- Paste cookie from browser DevTools (F12).
Your 6TB cloud system is now integrated.
8. Deploy RustDesk Remote Desktop
- Install Docker via BT panel;
- Install RustDesk Server container;
- Save generated Key;
- Download client:
- Set server IP + Key;
- Optional auto config:
rustdesk-host=8.8.8.8,key=xxxx.exe
9. Final Result
You now have:
- WordPress personal website;
- 6TB OpenList + Quark cloud drive;
- Private RustDesk remote desktop system.
A complete self-hosted digital ecosystem under your full control.
10. Optimization Tips
WordPress Acceleration
echo "net.core.default_qdisc=fq" >> /etc/sysctl.conf
echo "net.ipv4.tcp_congestion_control=bbr" >> /etc/sysctl.conf
sysctl -p
lsmod | grep bbr
- Install cache plugin (WP Super Cache);
- Enable PHP extensions;
Security Hardening
- Change SSH port;
- Regular system updates;
- Install Fail2Ban.
💬 Conclusion
If you completed everything, congratulations:
You are no longer just a user of cloud services—you are now the owner of your own digital infrastructure.