In this tutorial, we will show how to use GoEdge to build a simple CDN service.
GoEdge provides an intuitive management platform that allows you to easily create and manage CDN clusters, nodes, and websites.
Below are the detailed steps for setting up your own CDN.
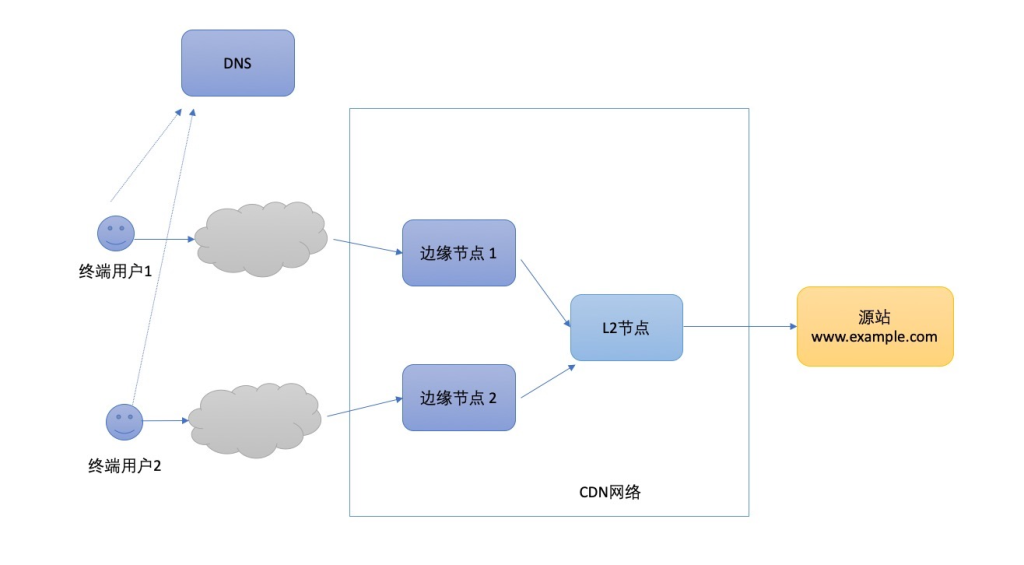
1. Understanding How CDN Works

CDN (Content Delivery Network) is a technology that caches content on multiple edge nodes to improve delivery speed and reduce the load on the origin server.
Basic workflow:
- When a user requests content, the DNS service routes the request to the nearest edge node.
- If the node already has cached content, it returns it directly to the user.
- If not, the node fetches the content from the origin server and stores it in cache.
- Distributed edge nodes reduce latency, improve access speed, and enhance reliability and security.
In GoEdge, although there are no traditional central nodes or regional nodes, it provides L2 nodes (available in the commercial version) that act as aggregation back-to-origin nodes, forming an efficient network architecture.
2. Why Choose GoEdge?
Compared with other CDN tools such as Squid, HAProxy, and Nginx, GoEdge provides a simpler user experience and a more complete solution.
Main advantages of GoEdge:
- Full management interface
All functions can be operated through a visual control panel without writing code, reducing the chance of errors. - Easy installation
Pre-compiled binary packages are provided, making installation simple even for beginners. - All-in-one features
GoEdge supports CDN acceleration, Web services, multi-tenant management, logs, monitoring, security (WAF), DNS, and more. - Easy integration & secondary development
Built with Go language and supports gRPC communication, making it easy to integrate with third-party systems.
3. Install the GoEdge Management Platform
If you have not installed the GoEdge management panel yet, follow the installation tutorial provided on the official website.
After installation, log in to the management interface to begin configuration.
4. Create a Cluster
A cluster is a container used to manage a group of edge nodes.
After creating a cluster:
- New websites can be deployed into this cluster.
- Nodes inside the cluster will process user requests.
You can use the default cluster or create a new one according to your needs.
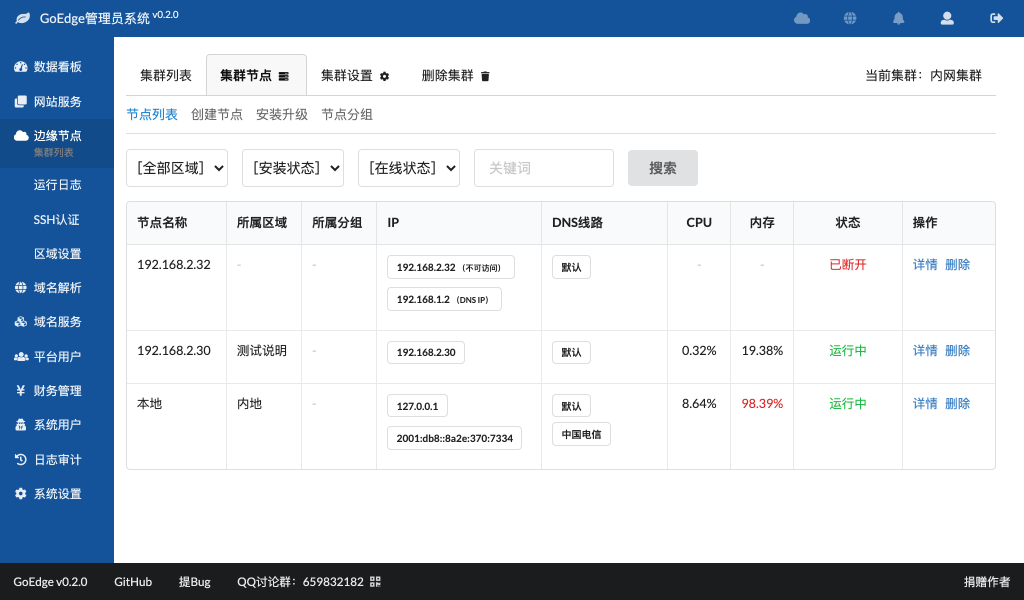
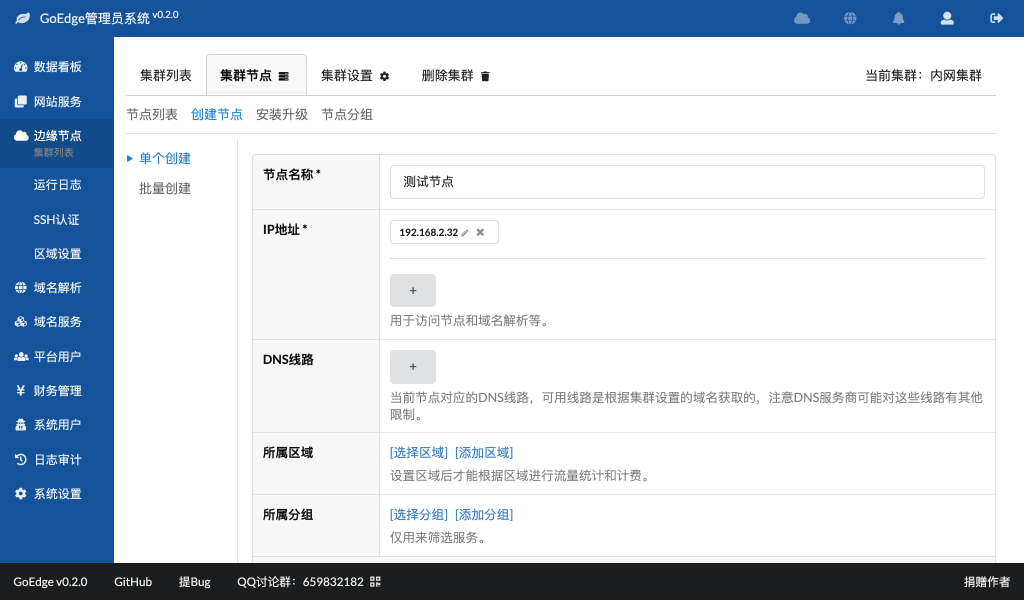
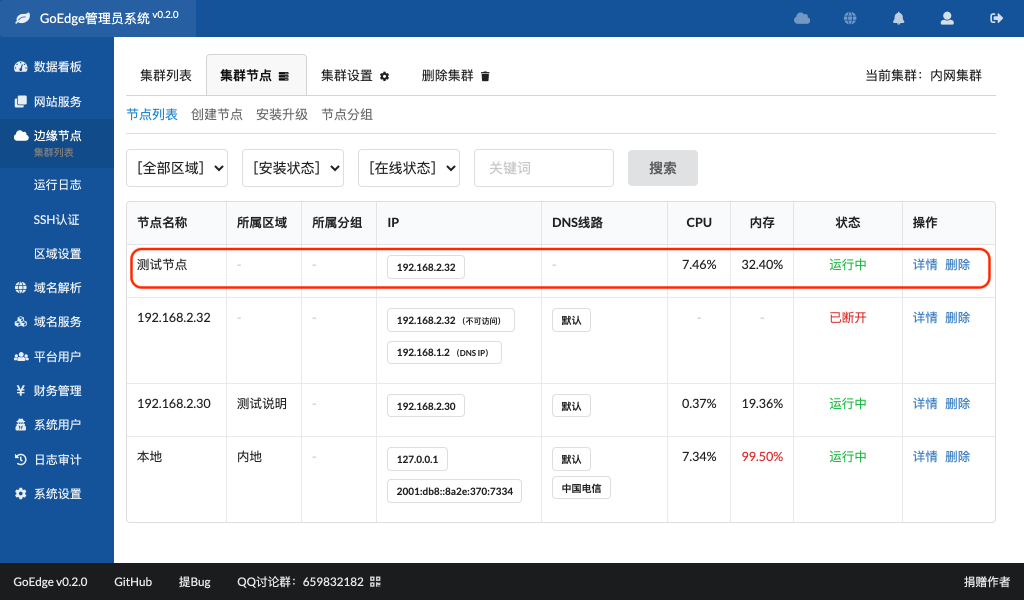
5. Create Nodes
A node is the actual server that processes user requests.
Requirements:
- Each cluster must have at least one node.
- Nodes can run on independent servers or on the same server as the management panel.
In the management interface, select:
Create Node → Fill in node information → Save
6. Install Node Program
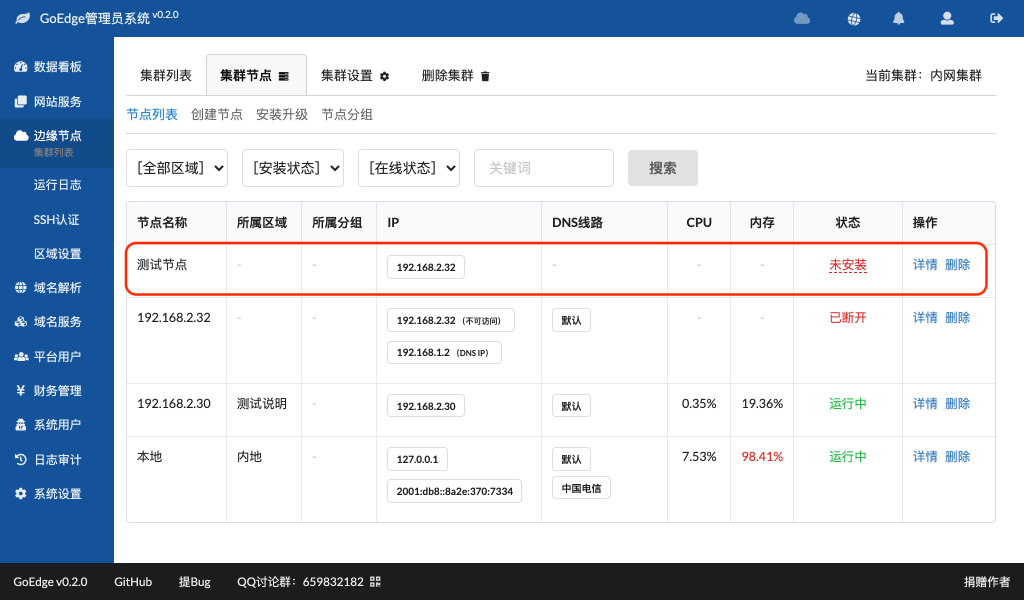
After creating the node, you need to install the GoEdge node program on the server.
Installation methods:
- Install via SSH
- Download manually and install
After installation is complete, the node status in the panel will show:
Installed
If not installed correctly, the node will remain offline.

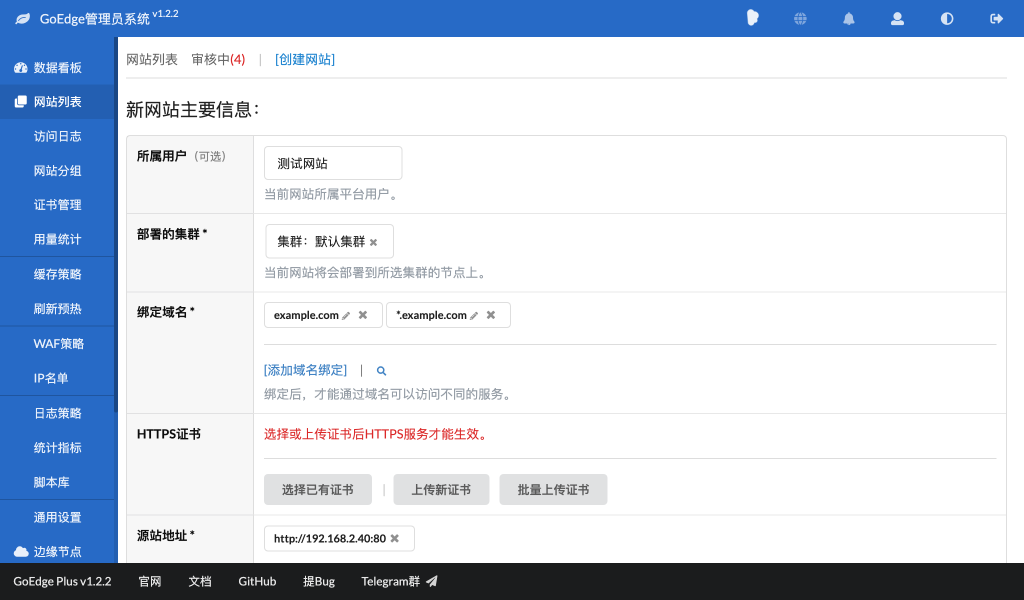
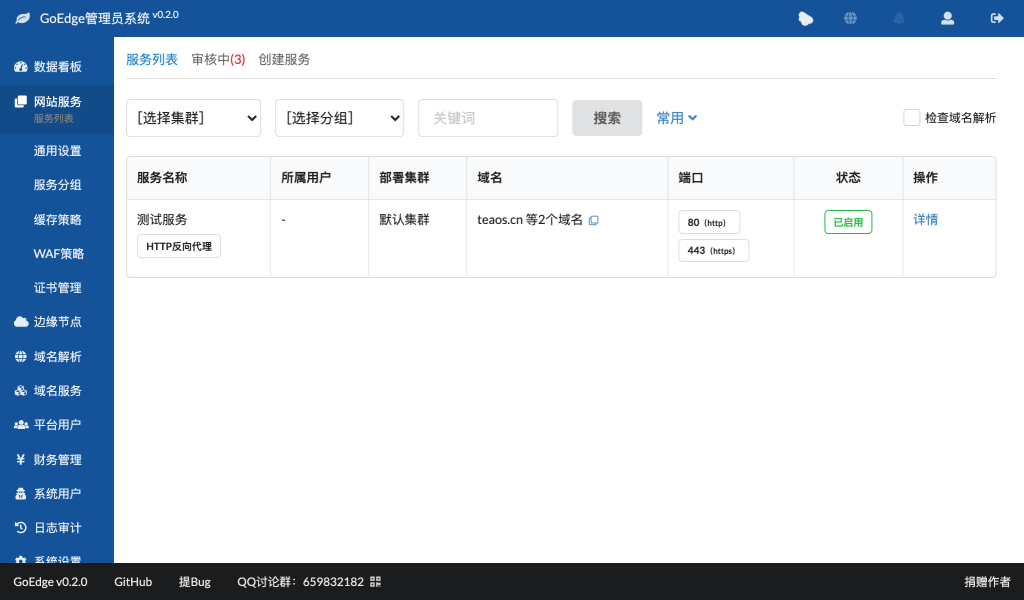
7. Create a Website
Once the cluster and nodes are ready, you can create a website.
Steps:
- Open Website List
- Click Create Website
- Fill in domain name and origin server
- Select the cluster
- Select nodes
- Save and publish
After this step, the CDN configuration is basically completed.
8. Manual DNS Resolution
After creating the website, you must resolve the domain manually.
Add an A record:
domain.com → Node IP
If the cluster contains multiple nodes:
- You can assign different DNS lines
- Users from different regions will connect to the nearest node
This improves performance.
9. Automatic DNS Resolution
For large CDN deployments, manual DNS management is inconvenient.
GoEdge supports automatic DNS resolution.
You can configure DNS rules in the management panel, and the system will:
- Automatically assign node IP
- Automatically manage records
- Automatically adjust routing
This is recommended for multi-node CDN setups.
10. Testing and Diagnostics
After all configurations are completed, test the CDN.
Test methods:
- Access via domain
- Access via node IP
- Use ping
- Use curl
- Use netstat
Check:
- Whether the site loads correctly
- Whether cache works
- Whether nodes respond normally
You can also check:
- Cluster status
- Node status
- Logs
- Monitoring panel
11. Troubleshooting
If the website cannot be accessed, possible causes include:
Node not running
Check:
- Node status
- Installation status
- Network connectivity
Port binding failed
Check:
- Port number
- IP binding
- Service status
Firewall blocking
Make sure the firewall allows required ports:
- 80 (HTTP)
- 443 (HTTPS)
- Management ports used by GoEdge
Also check cloud provider firewall rules.
Summary
Using GoEdge to build a CDN is relatively simple:
- Install management panel
- Create cluster
- Create node
- Install node program
- Create website
- Configure DNS
- Test and debug
With its visual interface, easy installation, and powerful features, GoEdge is a very suitable solution for building a self-hosted CDN platform.